18 August 2011

Project "His Master's Voice Soundbox No.5B"


the current soundbox/reproducer i have on my gramophone was bought on ebay from india and it arrived in pretty bad shape. for starters, the diaphragm had a hole in it and the rubber connector crumbled into dust when i fitted it on to the tonearm.

i scrounged the world (online) for spare parts and managed to get a new rubber connector a few months ago but i had no luck with finding a replacement diaphragm...UNTIL LAST WEEK!!

i would like to say a big thank you to Mr. Ken Priestley of the U.K for his expertise. i managed to find a new diaphragm from him and those of you looking for spare parts for your gramophone can look for him at his website: http://www.fonograf.talktalk.net/

anyway i ordered a new diaphragm from him last week and it arrived here in singapore within 8 days (as fast as international mail gets around these parts).


he packed it really nicely with cardboard spacer preventing the diaphragm from warping/tearing.

anyway...if you are interested to do a diaphragm replacement on a HMV 5b soundbox, this is how i did it:


unscrew all four screws on the back of the soundbox and the rear (black) plate comes right off. in the picture above, you can see the felt gasket that is fitted around the edges of the diaphragm to make it more airtight. you can see the lousy repair job i did on my old diaphragm...i basically glued aluminum foil around the hole to patch it up!


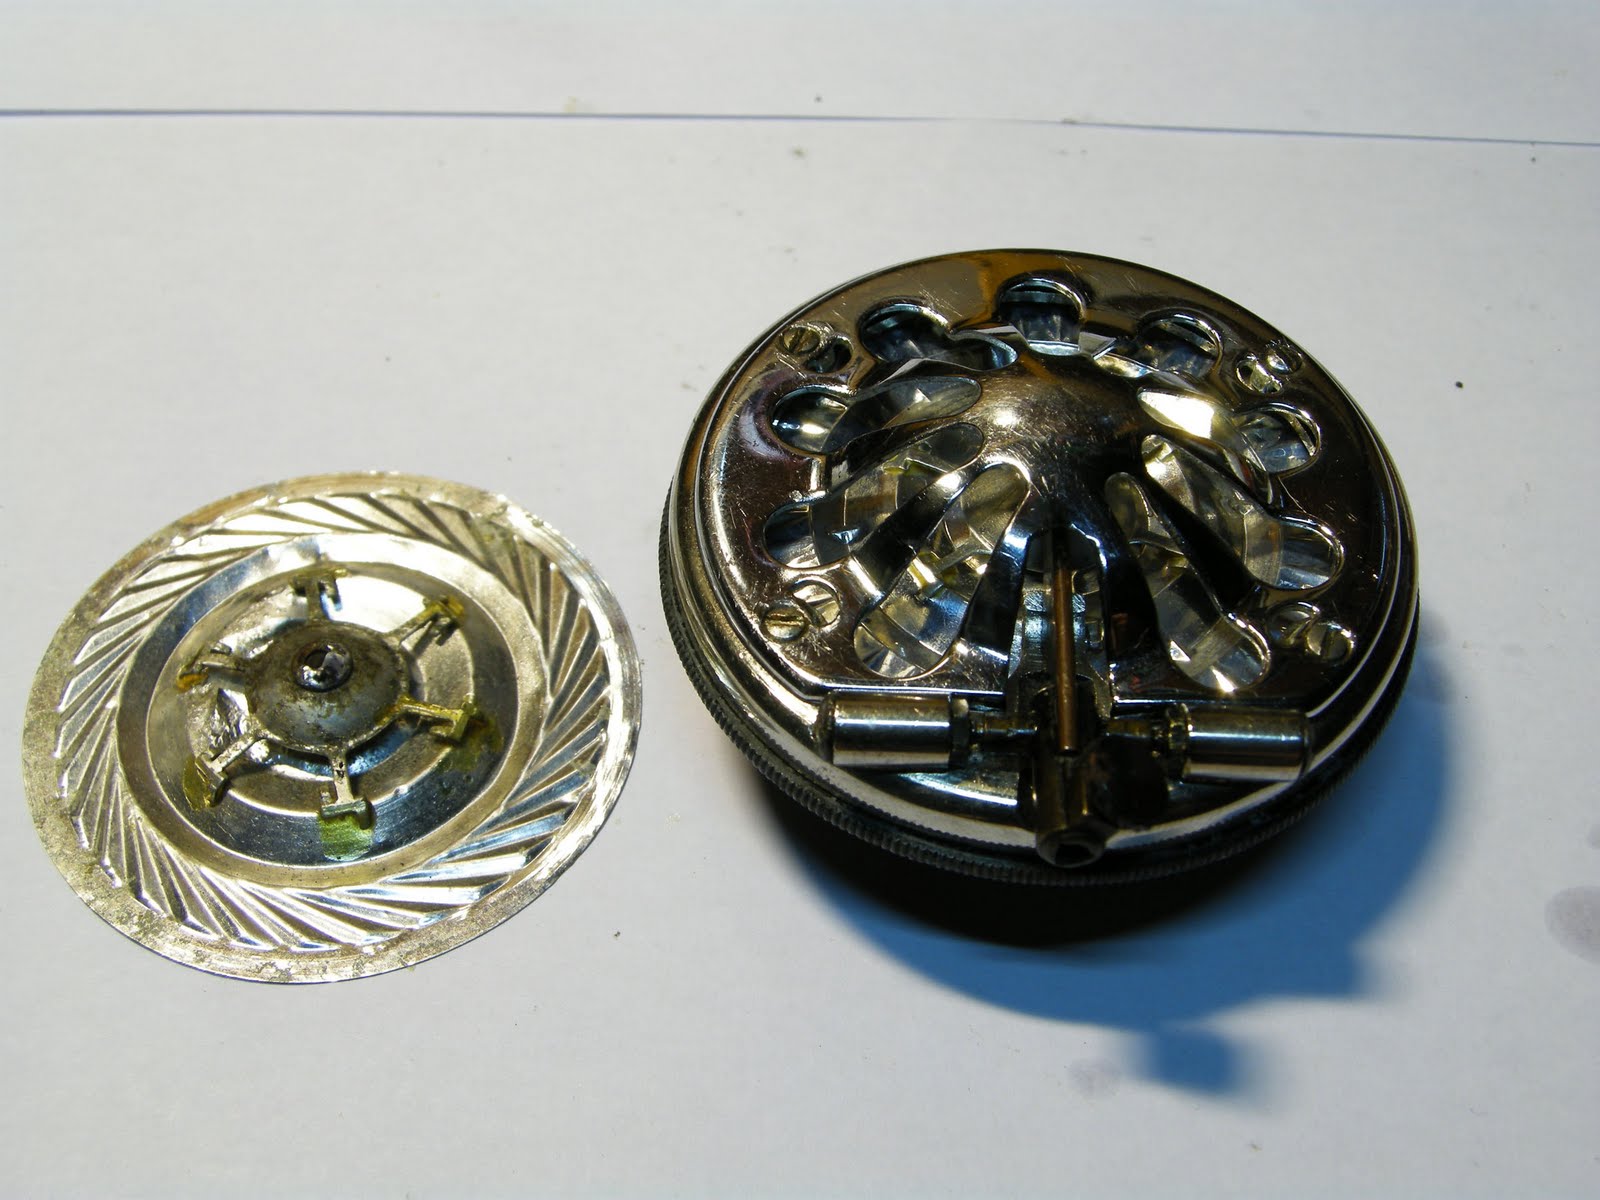
remove the four screws on the front plate of the soundbox. use a pair of pliers to hold the nut on the needle bar and gently unscrew the pivot screw (both of them). at this point the diaphragm and the needle bar can be gingerly removed from what's left of the soundbox.


you should then be left with just the diaphragm and needle bar as shown in the picture above. the needle bar on mine was soldered on to the spider. you will obviously need a soldering iron to melt the solder, so be extra careful during this step! i put a small precision screwdriver to hold the diaphragm in place as i desoldered the needle bar from the spider like so:


look at the difference in condition between my old tattered diaphragm as compared to the new one, no prizes for guessing which is which!


i soldered the needle bar on to the new diaphragm, making sure to position it in the center of the spider. the soundbox can now be reassembled by working backwards from the steps shown above. if you find the needle bar is out of position after fitting the diaphragm into the soundbox, it can be repositioned by simply touching the soldering iron to the solder and small adjustments can then be made.


i fitted the soundbox back on to the gramophone and played a few records. one of the obvious improvements i noticed straightaway was the increase in volume and overall fullness of the music, no more wasted energy due to air leaks! voices were clearer, strings were cleaner...its a pity i couldn't have gotten a perfect diaphragm sooner, but i'm very happy that i finally do!


11 August 2011

Project "Wehrle Polo Alarm Clock"


i saw this alarm clock at a flea market and noticed it had a second hand on the bottom. i'm not an expert in any way with clocks/watches but it seemed like a nice thing to have on an antique mechanical alarm clock so i bought it. it also has the words "made in germany" at the bottom so it should be of some value. (right? german efficiency and all that?)


it kept stopping on its own after every five minutes, so it was in need of a cleaning and tuning.

the problem with this clock is that unlike other 'normal' alarm clocks, this one had its back crimped on to the body. that makes it a few hundredfold harder to open. i applied some oil around the edges and slowly eased the back plate off the body with a small screwdriver.

another problem was that the knobs at the back could all be unscrewed except for one: the time adjustment knob which is in the center. it obviously couldn't be unscrewed because you can turn the knob both clockwise and anticlockwise to adjust the time.

to remove the knob you will have to pry open the back plate (like in the picture below) and use one pair of pliers to hold the shaft that it is attached to on the inside and another pair of pliers to slowly pull the knob out. (dabbing some oil would be good, the shaft in my clock had some rust on it and was nearly fused to the knob)


remove the two metal feet from the bottom by simply unscrewing them from the body, once that is done the whole back plate can be removed.


the only thing holding the clockwork to the body now is the snooze button up on top. the button is held in place by a circlip shown in the picture below, pull the clip out (gently) with a small pair of pliers and the button can be removed.


once the snooze button is removed, the snooze button holder can also be removed and the clockwork comes right off the body. the snooze button assembly is really small and easy to lose so make sure you put it somewhere safe!


i can't really explain much about the gears, all i can say after looking closely at the mechanism i managed to identify the gears that were affecting the system and a few dabs of light machine oil here and there made the clock run smoothly without stopping (overnight) so it was better than when i first got it.

this video shows how the snooze button works:


the top knob sets the time the alarm will ring. when it does ring and you press the snooze button, the ringing will stop and the button stays down. it will pop back up only if the alarm spring is rewound (which is what people will usually do before they go to bed). it doesn't sound like it's ringing because the back plate has to be on...it is definitely loud enough to wake someone up unless they're in a coma.


the glass (not plastic) lens simply needed a good cleaning with liquid glass cleaner.


before:


after:


so now it was ready to be put back together!


on a side note: the back plate kind of looks like a sad, four-eyed alien, don't it?


i think it looks slightly more brand new now...but the body gives it away. still...it's a nice clock to add to my collection of old stuff!